AI virtual try-on for fashion stores
See it.
Wear it.
Let shoppers try on your clothing with their own photo, directly in your store.

AI virtual try-on for fashion stores
Let shoppers try on your clothing with their own photo, directly in your store.
Show each shopper how your clothing could look on them.
Help shoppers choose with a clearer view before checkout.
Match the widget to your storefront and shopping journey.
Help reduce avoidable returns with better-informed purchases.
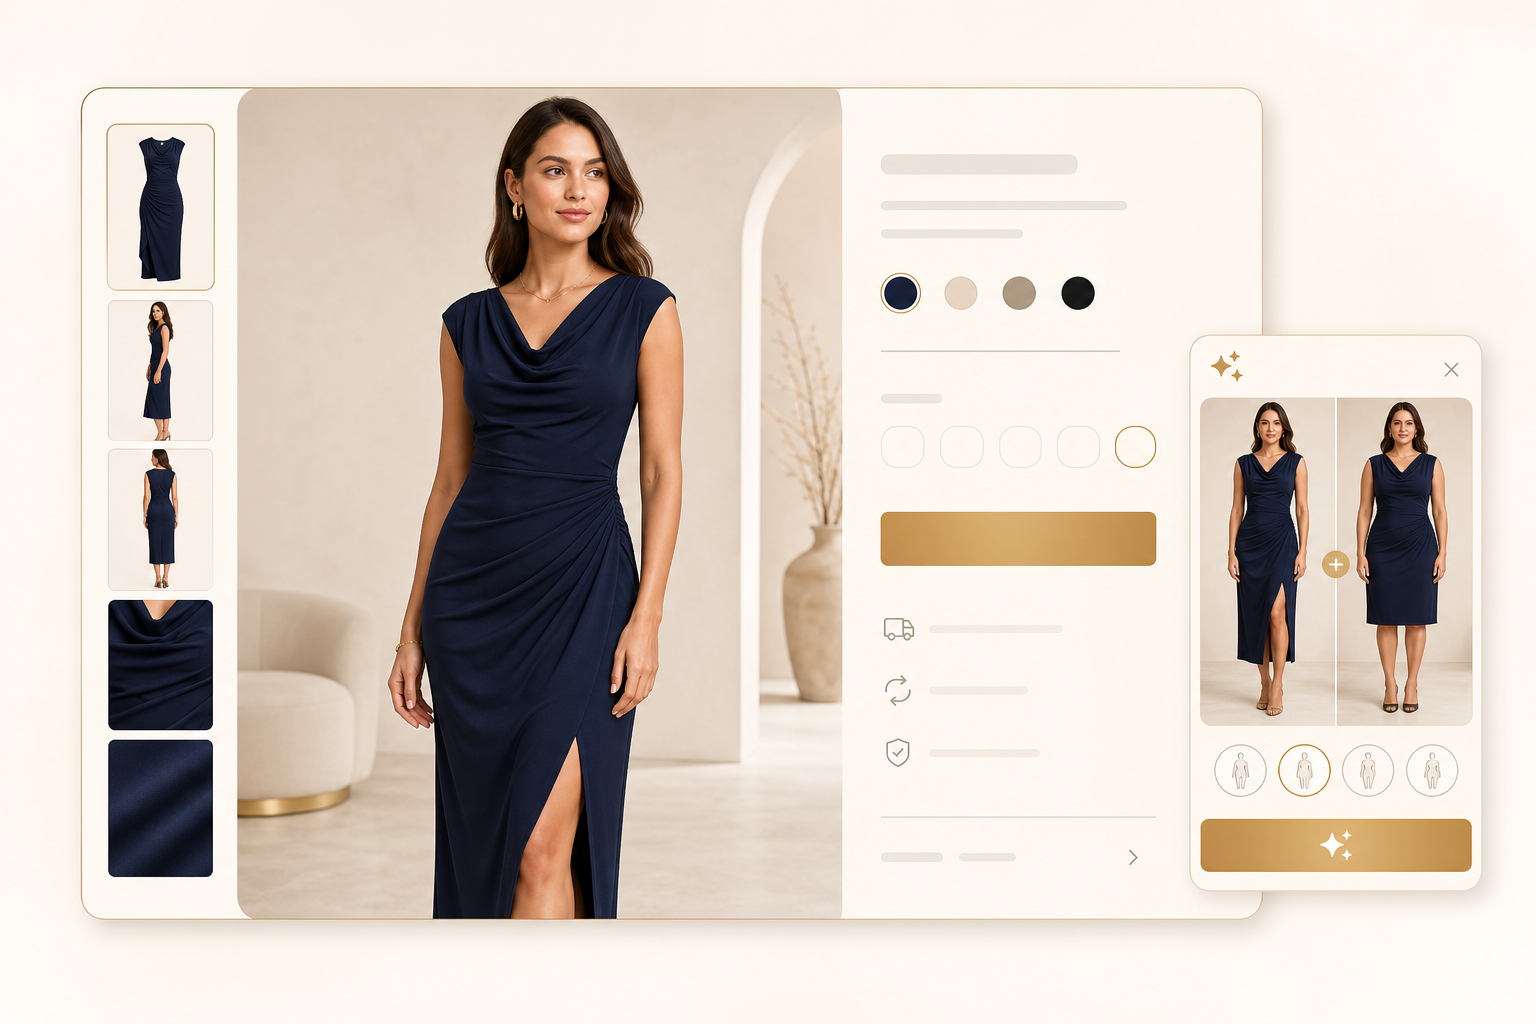
A shopping experience made personal
Shoppers choose an item, add their photo, and see a personal preview before ordering.
Why personal previews work
of EU internet users shopped online in 2025. Fashion was a leading category.
Source: Eurostat researchof surveyed shoppers delay or avoid decisions when choice feels overwhelming.
Source: Google + Ipsos researchof respondents in our 2025 Bulgaria survey wanted to see clothing on themselves before buying.
Source: AhaDrobe Bulgaria surveyBuilt around your store
Customize AhaDrobe and manage your store settings from one workspace.
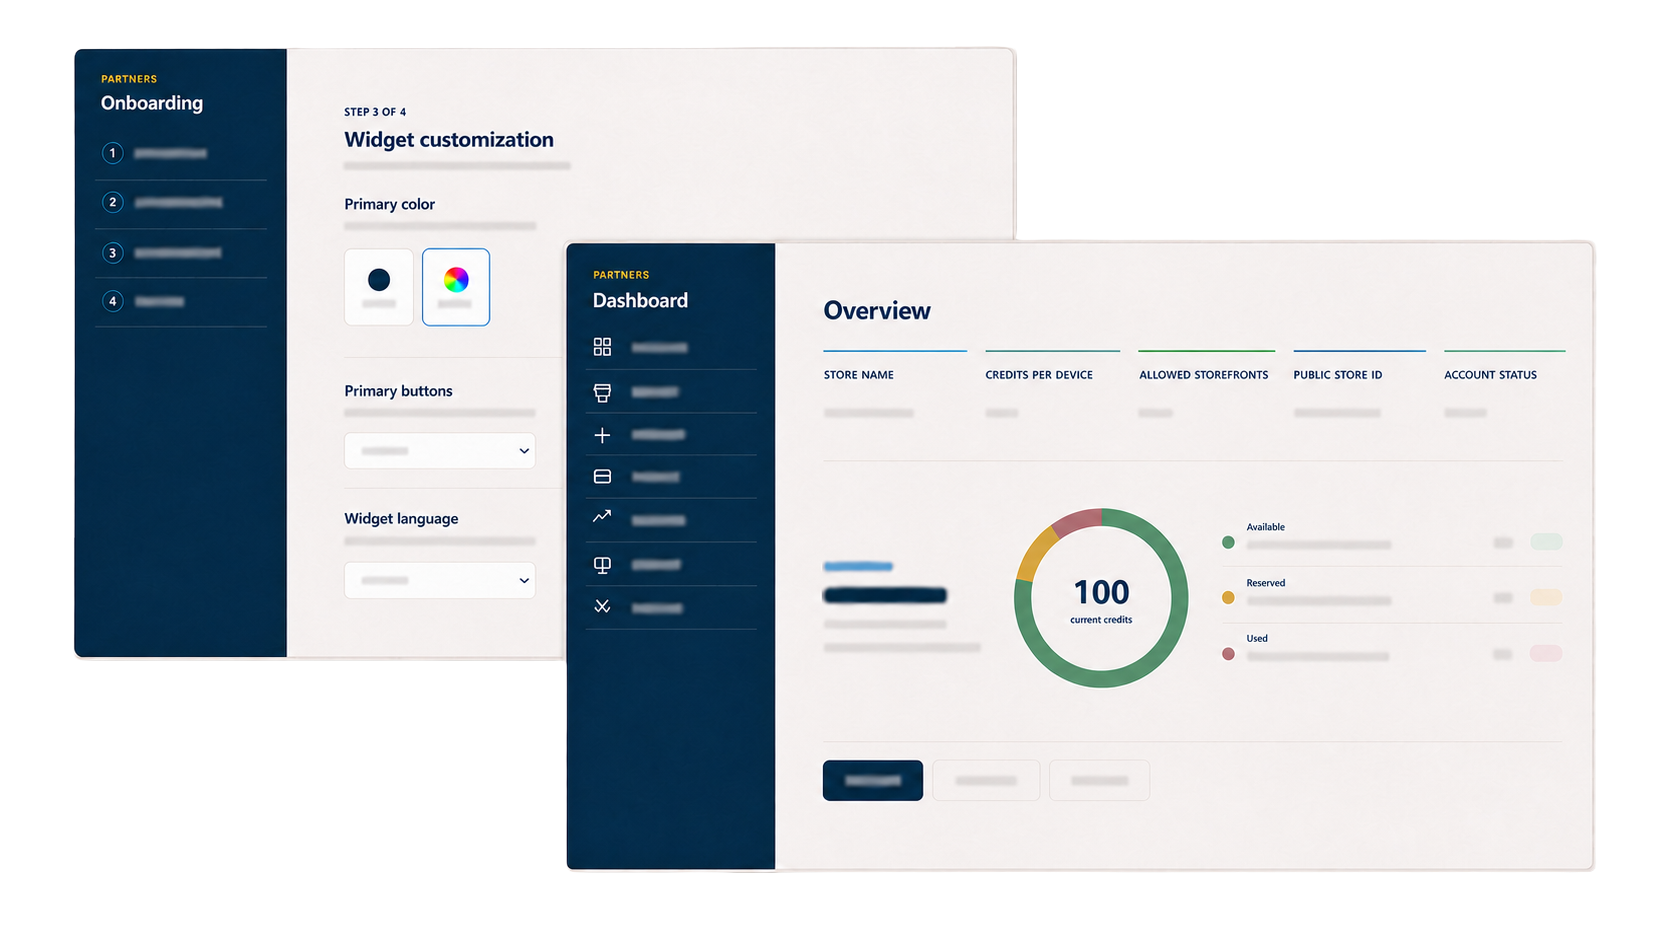
Built around your store
Match the widget to your storefront, language, and style.
Update storefronts, device limits, and widget settings anytime.
Unused device credits return to your store balance.
Before you launch
Simple answers about virtual try-on, credits, and store settings.
See all questionsGive shoppers a clearer view before they buy.